deleted
figured it out
nothing to see here
Wednesday, November 24, 2010
3D artwork
Here is a list of some great abstract 3D artwork:
http://creativedesignmagazine.com/100-spectacular-examples-of-3d-abstract-art.html
http://creativedesignmagazine.com/100-spectacular-examples-of-3d-abstract-art.html
Friday, November 19, 2010
Image map not reflecting?
Hi,
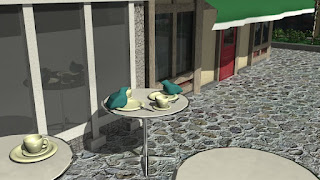
Quick question. I'm making the windows for my cafe, but the file image I used for the cobblestone ground is not reflecting in the window.
As you see, any object that I built in Maya reflects just fine, but any texture created from a file image won't reflect.
Why is this and is there something I can do to fix this?
Thanks!

Tuesday, November 9, 2010
SSS courtesy of Leslie
Maya
Quick Guide for setting up a an object with a basic Subsurface scattering shader
1. Create object(s)
Subsurface scattering is most visible on objects that have areas of thin geometry
2. Create two lights
1 area light: lighting the front of your object with an Intensity of ~ 1.2
1 spot light: lighting the back of your object with an Intensity of ~ 1.5
3. Add a misss_fast_skin_maya shader to the object(s).
a. In the Attributes Editor for the shader, change the following Weights down to
0.00:
Diffuse Weight
Epidermal Scatter Weight
Subdermal Scatter Weight
Primary Specularity Weight
Secondary Specular Weight
b. Start by entering a value of 0.500 for the Back Scatter Weight.
c. Render the scene…and be sure your camera is facing the front of the object
(this allows the object to be backlit by the spotlight).
d. Adjust the Back Scatter Weight until you can see a notable red glow to the
out edge of the object. The Back Scatter Radius can be increased/decreased
determine the spread of the glow. ***If you are seeing a black screen with
NO red glow, see the Normals solution below.
e. Continue to add values to the different scatter weights, in this order:
Subdermal
Epidermal
Diffuse
Primary Specularity
Secondary Specularity
***Normals Solution
Problem: When you first drop the SSS shader onto an object and render it, it does
not look anything like subsurface scattering (looks like a regular blinn) OR when
you render with only a value in Subdermal Scatter Weight, you get a black screen
with no red glow.
1. Select the Object
2. From the Polygons Menu, choose Normals > Reverse
3. Render again, and you should now be able to see the subsurface scattering effect.
extra note:
to give the impression of an object within your main sss object that blocks some of the light coming through, put the same sss shader on the small blocking object and place it inside the geometry of the main object
Mental Ray
Does anyone happen to have instructions for activating the Mental Ray renderer on a new set up?
~Sara
~Sara
Tuesday, November 2, 2010


Thursday, October 28, 2010
Caustics Render and X-mas Lights


Here is the best render of my Assignment 2 scene, with a surface shader plane illuminating the scene, global illum, final gather, and caustics. After that is my "TV glow" extra credit: glowing x-mas lights!
Glass Organelles
 Here is the best render of the series with global illumination and final gather turned on, but without caustics. I didn't really like how sharply the illuminated plane reflected in the golgi and the lysosome (the bright glowing ball) was suppose to demonstrate a 2-sided blinn material but the glow intensity applied to the interior material blows out the outer material. I like it anyway, maybe this would make a better light source than the plane!
lighting assignment
Lighting assignment
all of these images are rendered with Vue with varying degrees of post work in photoshop.
they are all the exact same terrain with the exact same textures, just rendered with different atmospheres and lighting. some are rendered with ambient occlusion, some are rendered with global radiosity
the plant life images at the end are the same terrain with added ecosystems. they were rendered with global radiosity (similar to final gather) with little photoshop work done, so they are closer to what would appear straight out of the vue native render


(hour and a half render time at 800x600 resolution)

Assignment_2 Chris Bohlen
Final Gathering/ Global Illumination:

Final Gathering Plane Light Source:

Occlusion Pass:

Mental Ray/ Raytracing:

Maya Software/ Raytracing:

Caustics_1:

Caustics_2:

TV lighting 1 (Extra Credit Attempt):

TV lighting 2 (Extra Credit Attempt):


Final Gathering Plane Light Source:

Occlusion Pass:

Mental Ray/ Raytracing:

Maya Software/ Raytracing:

Caustics_1:

Caustics_2:

TV lighting 1 (Extra Credit Attempt):

TV lighting 2 (Extra Credit Attempt):

Tuesday, October 19, 2010
Assignment 3
32 bit float .exr rendering, tone mapping, linear workflow, gamma correction R&D tests
over the last few weeks i have been researching linear workflow and have been attempting to
recreate HDR photography using mental ray rendering. without getting too much into
it-
simple test using a dialectic material & simple gamma correction
8 bit result, no post

32 bit HDR tone mapped result-

practical example of indoor lighting scenario (lit with MIB blackbody physical area lights)
8 bit result, no post-

32 bit hdr render (looking at it now it looks a bit underexposed and probably too much detail added in the HDR toning, but its just a quick test so screw it

quick and dirty color corrected final result-

and these look terrible online because they have been overcompressed


Thursday, October 14, 2010
vessel in progress
So I'm able to render out of Maya Hardware in general,


but the computer crashes if this last piece of modeling is visible in the frame. I'm still working on a plan for that.


but the computer crashes if this last piece of modeling is visible in the frame. I'm still working on a plan for that.

Golgi Apparatus & Co.

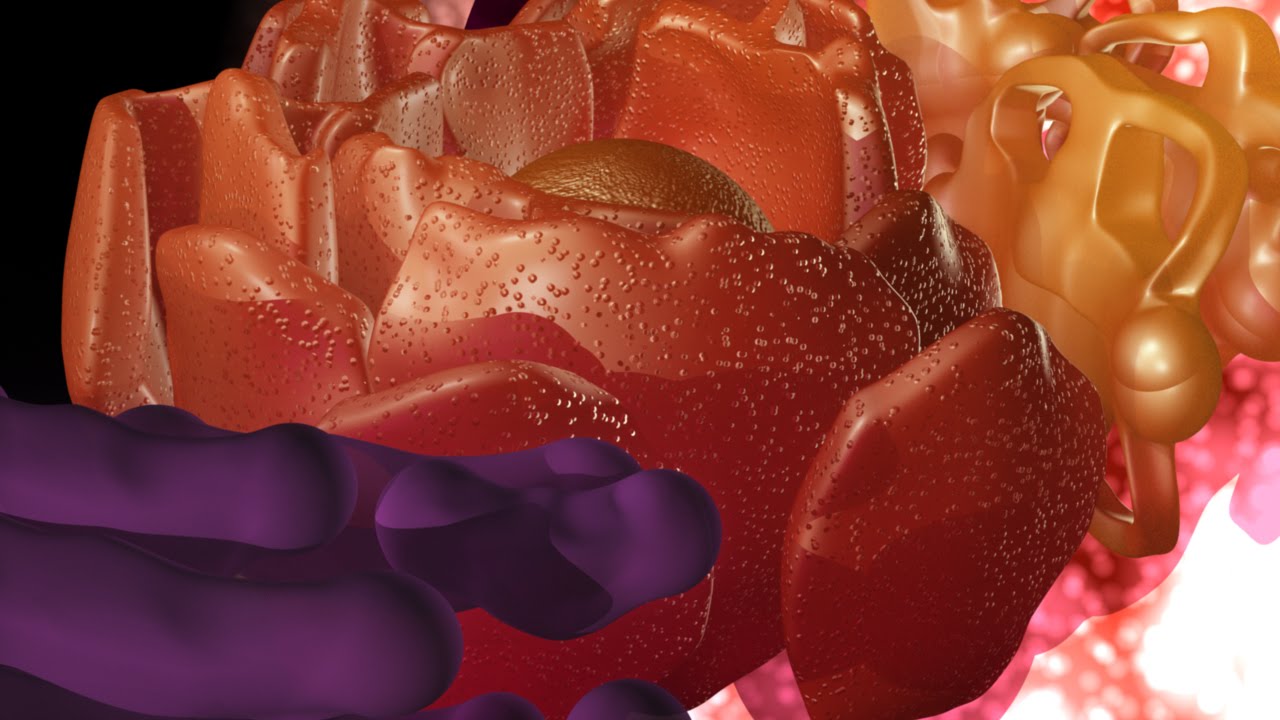 My organelles need lots of work in the materials and lighting department, but I'm slowly building up the detail on the modeling and composition. Looks like skittles! Gabi and I will composite our organelles and together develop an appropriate color scheme and material library.

The Heart
My entire scene for this final project is basically the heart... which is a very complex piece of anatomy to model accurately. I have used Mimics so far to sort through 240 slices of CT scans and create a heart. I then imported the heart into Maya and cleaned it up a bit. I tried extruding and changing some things, but the mesh that is on the heart is currently a mess so nothing was really matching up. I went with this for a while and created a plane slicing through the heart, showing the chambers. It is messy on the edges because I decided then to re-create the heart by hand and then "stitch" this plane into place.


So now I have taken my model into 3DS Max in order to create a mesh that I can actually work with. This process is called re-topology. It is quite tricky, but basically you create one polygon at a time over the existing object. I've almost completed this process... here are some screen shots.


Subscribe to:
Posts (Atom)