Tuesday, August 31, 2010

Assignment 3 - Rings

So for this one I went back to the first assignment's composition. Here are my 2 angles...

I used a lambert background with leather texture (both in the bump channel and also in the color), and a phong e for the rings with some translucency and extra reflection.

I then did one more with the occlusion pass from before and composited them together in Photoshop. This is my favorite look I think...

A Problem He Tries to Hide


I wanted to create a doll that's creepy (i failed though). I gave it one arm with lots of sharp points. The points represents his problems that are sticking him through his heart. He is alone and isolated, with a solitary window that he can look out of. Thought the window, and what ever is out there is his reality, the actual reality is that everyone else can see him and his problems, that's why there is no roof.
There is a whole wide world beyond the little window, but it's too dark tonight. How do I know that there is something out there? What if there is absolutely nothing... or what if it's too much of everything? How would I find my way around that unknown? And do I want to venture out into the darkness? Maybe I should sit where I am, draped by my favorite curtains, finding meaning in the passing nature of life and beauty... in the safety of my room. Safe and sound.
But I'm not sure about the soundness.

Whew.


This week I am reminded of how little control I have over digital mediums like Maya. Oh boy.

I have worked for a landscape architecture firm for three years and over that time have become very familiar with a wide variety of plant life. It struck me last class that modeling plants would be a great way to practice the extrude, cut faces and smooth commands. So I did my best to model something like a Baptisia flower and then duplicate it many times, tweaking the rotation and scale to compose an interesting field. I was disappointed when my computer did not seem to have the juice to render the whole field, but here's a screen shot of the field and an occlusion rendering of a close-up on the flower...

Little Kid's Bedroom and Ocean Floor


I started modeling a little kid's room because the toys were fun to create! I used the extrude tool to create the furniture and the stuffed animal. I also used the Bevel tool to round out any sharp corners. I also tried some component editing for the pillow and the lamp.

Female torso sculpt


This is a sculpting WIP (emphasis on WIP, definitely not finished) of a project I am going to be working on for this class. This was made in Zbrush using a base mesh of a male torso I had modeled last year for a previous assignment

Monday, August 30, 2010

assignment 2

Ok, so I started this assignment off with grand ideas. I often make little skulls out of Super Sculpey, and I'm about to do an animation about the skull, so I thought I'd give it a whirl. Unfortunately, try as I might, I could not get the two objects I'd started with to come together well, and wound up with a mess of a maxilla. Perhaps I can learn what would have made this work next...

So then after finally giving up there, I decided to just play more abstractly and came up with something that looks a little underwatery to me.


I'm a little puzzled in general with working with things as soft objects which are actually pointy objects. I'm hoping that this will come to be more intuitive over time.

~Sara

Cilia

For the extrusion exercise I decided to recreate a scene I struggled with last semester: the ciliated epithelia of the trachea. I felt much more control using the extrude tool in Maya was able to quickly create a population of cilia by extruding adjacent faces from a simple plane geometry. I wanted to convey a sense of movement and depth and think that if I add in the players, the pollen molecules which are propelled forward by the cilia, it will contribute to a stronger suggestion of action within the scene. To be continued ?!??

Droid


I started working on this in class, not knowing we would be needing to post another still from our work. I recently purchased an android phone and show the character so I decided I'd model him out. I had placed their logo in the picture frame but I guess the occlusion pass doesn't render out flat images.

-Michael Morua

Rainy Horse

I used to sculpt toy horses when I was a kid, so I decided to make a digital horse sculpture for this assignment. I made the horse by extrusion from a box, and then used the sculpting tool a little for editing. There were some artifacts on one of his forelegs, so I couldn't get it to extrude correctly. A lot of my mesh is doubled, and I think that may have to do with it. So I put him in a pond in the rain :)

Cacti

I started planting a small cactus garden today, which inspired this scene. I tried several types of extrusions and used smoothing on the one succulent type plant. I also tried out the "ninja sword" tool on the pots, but that is hard to see from this angle. Overall, it was a pretty fun experiment.

CakeLand Abduction


I decided to make a scene of a place called CakeLand. It is made out of cupcakes, ice cream, lollipops and gumdrops. Some sweet-toothed aliens decided to suck some of the treats towards their spaceship. The sprinkles took a long time to add so I put in a detail shot. And of course there is a cherry on top.

My Home Workspace


For my extrusion project I decided to recreate my work area at home. My reason for building this was because I have never built a scene quite like this before, so I decided to give it a shot. For the occlusion pass I went into the hypershade and attached the ambient_occlusion node under "textures" mental ray to the surface shader and made the necessary adjustments in the amb_occlusion's attribute editor. I also changed the background settings under "environment" in the perspective camera's attribute editor to a light grey instead of black.

Sunday, August 29, 2010

Melt


I got my inspiration from water droplets to create this image. Vertices on a plane were paint selected in a circular pattern, pulled downward and smoothed out to create an interesting shape at the top. Few of the faces on the plane were then extruded even further to create the melting effect. Soft selection was used to create the droplet shape from spheres. I experimented with depth and value by arranging simple and complex shapes.

Here is there model from a different perspective.

Particulates


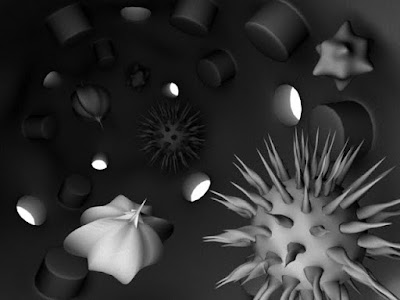
Playing with the extrude tool on primitive polygons was a lot of fun. I wanted to make multiple different looking "particle" like objects and have them be floating in an interesting environment. I wanted the environment to have multiple sources of light so I punched out some circular windows. I also wanted to create a sense of depth in the environment so I placed the objects at many different distances in the space I created.

Within the Veins of Poprox Muhghee

I began by using extrude, cut, and smooth on sphere primitives. Then, I placed the spheres in a wiggly tube. I hoped to include more spheres, but my time was exhausted trying to lighten this render. It was very dark so I made a few adjustments in the occlusion settings. With more time I would also like to achieve a larger contrast range from white to black.

Friday, August 27, 2010

Deep Space


Just a few months ago, I was introduced to an old sci-fi show called Babylon 5 and I've been dedicated to watching the entire series. While it is a totally cheesy sci-fi show, it inspired my idea for this project assignment.

For the background environment in the occlusion pass, I used half of a sphere to cup the background. I wish it was darker, but no matter how far I take the sphere back, it doesn't change much from being a midtone.

I've attached a plain render for a different perspective of the environment. I also played around with color in the normal render in order to emphasize the lasers.


-Melissa

Thursday, August 26, 2010

Revenge of the baby-spheres


Once, there was a place, where a community of Equidistants seemed to have finally found their optimal shape. Yet their seeming stability proved no match for a growing society of the Inside-the-Box Order. The outcome of this encounter could have quickly become quite unequivocal and ... orderly, had it not been for the baby-spheres. Some of the Equidistant youngsters were not paying attention in school, and they failed to internalize the equidistant values of stability. And here we see their vibrant and daring excursion into the unknown. Let's wish them fair winds!

Oh Balls!


For this assignment I wanted to gain a better understanding of how the distance between objects yields value, texture, contrast, and shading in an occlusion render.

Abstract From the Other Side


This is my occlusion render that I have named "Abstract From the Other Side" . I created layers of depth that you have to go through with different types of shapes through out each layer. I tried to make as many shadows as possible to show off the curves and sharp angles of each geometric object. :)

Too Many Planets (or: Pluto's Revenge)


This image depicts a group of former planets invading a subterranean city. The planets are disgruntled at being downgraded from "planet" to "celestial object" and have decided to take revenge on the offending astronomers.

In this, my first Maya rendering, I experiment with depth of field and weight or weightlessness. While I admit that this image is the result of pure noodling, I am pleased with the ominous feeling that the tunnel creates and with the gradient apparent in the groupings of planets.

Wednesday, August 25, 2010

animation still


this is a still from my final project last semester for the animation class. This is an ongoing project that I will continue to work on and hopefully finish at the end of this year. This is an occlusion pass using the surface shader connected to an AO node, which is better because you can tweak tweak the samples to get a smoother shading, at the cost of render time (this is set to 256 from default of 16, rendered in HD 1280 x 720 production setting). I also included the (semi) final render which uses built in ambient occlusion from the MIA material X shader

Random Geometric Landscape


Here is my geometric landscape composition in black and white. I wanted to play around with circular objects just because I love how light and shadow slowly shapes around the object. I also included an open sphere to see how Maya would show the inner part of the "bowl" that I created. This was a fun first experience fooling around with Maya!

Precarious Pots

I was inspired by an installation I saw years ago by Tara Donovan where she used Styrofoam cups and loved the concept of transforming common materials into an ethereal environment. Far less elegant, I modeled a clunky composition of cups or flower pots, stacked and clumsy, but which give a sense of depth and demonstrate the occlusion attribute by defining a more realistic relationship among objects. If you want to check out Tara Donovan here's a good link: http://www.acegallery.net/artistmenu.php?Artist=8.

Castle

A simple castle. Question: In 3dsMax, by clicking + shift and dragging an object, you can get a clone. Any idea of how to achieve this in Maya, or are we limited to the copy/paste function?

Also, the Lynda tutorials for Maya 2011 Essentials are great!

The Hungry Caterpillar


I feel that the caterpillar shape is a great example to emphasize the result of an occlusion pass. Plus, who isn't inspired by The Hungry Caterpillar?
In creating the model, I learned not to use Ctl+C to duplicate images, but instead Ctl+D.

-Melissa Sisk

Landscape


Inspired by some of the artwork we saw on Tuesday in class I decided to make a landscape using basic primitives. It was fun and I really liked the way the shadows on the clouds turned out.


[Lauren Conroy]

Balancing Act


This is my occlusion render for the simple shape set up. I tried to use several overlapping objects in order to emphasize the shadows that are created when using occlusion maps.

Black & White Rings


I was playing a little with rings in class and liked it before, so I decided to play along the same lines today. I guess the next step is learning how to smooth the shapes.
~Sara Egner

Accident


I threw together a still life type model, with the camera right in on the action. I made the pellets fall out of the vase to show the amount of space lightening and shadows can create. Even through they looked to be clumped together you still gain a sense of depth among them.

-Michael Morua

The Nelhob Robot_ By Chris Bohlen


So I have been wanting to build this particular character for quite some time now and I suppose I just kept putting it off. I created a sketch of this little robot back in 2007 and I always wanted to know what it would look like in 3D and now I have a good idea. Overall, this is basically just a rough sketch of what the character can be. I am most likely going to proceed with this robot character to see just how far I can stretch it. I am definitely going to create many additions to it and a few subtractions, now that there is a direction lots of hard work is going to go into this character. I have a feeling that this little guy is going to be deliciously dangerous when finished.

Pillars and Orbs

I was working with showing depth and seeing objects from different point-of-views. Understanding how the occlusion pass translated into the renders was interesting.
-Sayaka Isowa

Eye level perspective


With this rendering, I was playing with the perspective line and the foreshortening of the objects. I was also experimenting with how the objects would render with overlap. -Matt Hunter

Banapple


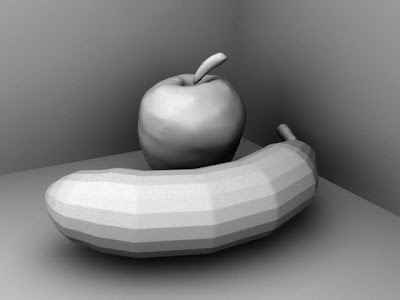
I don't know if I'd consider it good-looking, but here is my black and white. I was going to try figuring out how to smooth the banana, but this computer is so slow, and I'm sure I'll learn a better way to do it soon. I enjoyed playing with the apple though :)

Tuesday, August 24, 2010

Making a good looking black and white snapshot

go to the window menu, go down to settings/preferences, and select plug-in manager, make sure both boxes for mayatomr are checked off
make a few objects from polygon menu, arrange them
the icon with the blue ball in rectangle makes a frame, shows what will be rendered
clicking the little green bookmark icon will make a bookmark to return easily to one camera position (from view menu)
hitting first clip board render icon does a low res quick image

hit quick render clip board, go file > save, save as tiff or targa

for b/w shading:
Layer Editor, in "display" mode:
select objects, press far right of the four layer icons to make a layer out of those objects, put all objects into various layers double click and name and color them for easy reference. Now you can hide or show them to various degrees.
in "render" mode:
select all objcts, hit the 4th button to make a layer, name it "Black and White"
right click the layer, go down to attributes, click presets, select occlusion
click in the window
press the render button
(in the render view, go to options, test resolution, this lets you render faster at lower resolutions)

Monday, August 23, 2010

Welcome!

This is the class blog, use it to upload renders, ask questions, and post blog assignments